Adventures in Mega Drive Coding Part 4: More Tiles
WARNING: These are outdated and obsolete! Instad check out the new >tutorial section<. There you'll learn everything you could here but better!
Note: These are not tutorials, I'm just chronicling my progress as I figure stuff out. Some of the things I do might make an experienced Mega Drive coder cry out in anguish. Feel free to use these posts to guide yourself along, but be aware I might be leading you off a cliff!
Welcome back to Adventures in Mega Drive Coding, where I play around with SGDK in an attempt to get a Mega Drive game done this year!
So far we’ve only dealt with loading and displaying single tiles, which is cool. However, when you have to create a whole level, assembling them tile by tile isn’t the most efficient option. Luckily SGDK comes with a few functions to help us out!
First let’s look at a simple one: void VDP_fillTileMap(u16 plan, u16 tile, u16 ind, u16 num);.
This lets you draw a certain number of tiles starting from a specific index. Remember last time, when we said the Mega Drive had a horizontal resolution of 40 tiles? Let’s test that! First we load our pink block bitmap from last time:
VDP_loadBMPTileData(block.image,1,1,1,1);
VDP_setPalette(PAL1, block.palette->data);
Then we use fillTileMap() to draw some on the screen. If we start at index 1 and draw 38 tiles, that should create a line of blocks with a 1 block gap on either side.
VDP_fillTileMap(VDP_PLAN_A,TILE_ATTR_FULL(PAL1,1,FALSE,FALSE,TILE1),1,38);
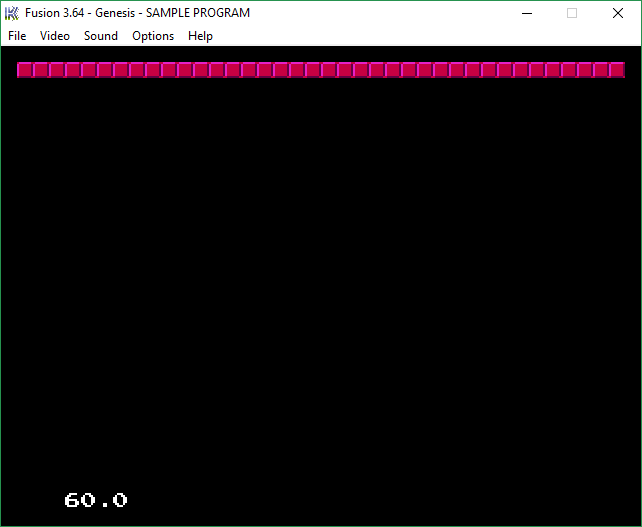
And indeed it does! Seems like we really do have 40 tiles to work with.
Looping
Then I wondered…what if you drew more than 40 tiles? My first thought was that the tiles would wrap to the next line. However, calling VDP_fillTileMap(VDP_PLAN_A,TILE_ATTR_FULL(PAL1,1,FALSE,FALSE,TILE1),0,80); resulted in this:
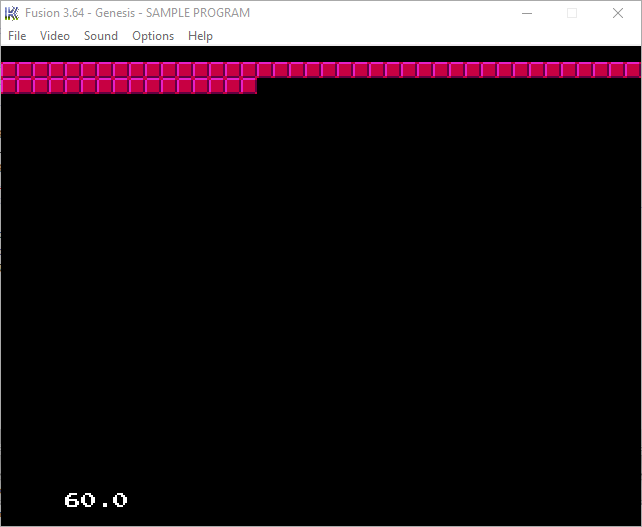
The tiles did wrap, but there are only 56 on screen instead of 80. What gives? Well, turns out the plane size does not equal the screen size. I played around a bit and found that planes were 64 tiles wide, meaning 26 tiles were off screen. You can also change the plane size using VDP_setPlanSize(w,h) with possible values being 32, 64 and 128 for both width and height (so the smallest possible plane is 32x32 tiles and the biggest is 128x128).
This is also when I found out that planes loop automatically. Let’s set the plane size to 32x32, then draw 4 tiles at the beginning:
VDP_setPlanSize(32,32);
VDP_fillTileMap(VDP_PLAN_A,TILE_ATTR_FULL(PAL1,1,FALSE,FALSE,TILE1),0,4);
If we now look at the result we can see that the 4 tiles pop up again at the end:
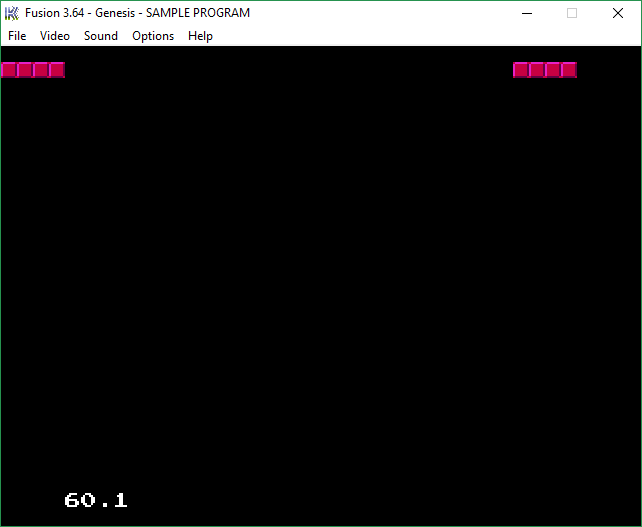
This should make creating scrolling backgrounds easy, once I get to that point.
Rectangles
Let’s look at one more function before wrapping up: void VDP_fillTileMapRect(u16 plan,u16 tile,u16 x,u16 y,u16 w,u16 h).
As the name implies, this one fills a rectangle that you specify. Let’s make a floor!
VDP_fillTileMapRect(PLAN_A,TILE_ATTR_FULL(PAL1,1,FALSE,FALSE,TILE1),0,26,40,2);
This should draw a rectangle of 40x2 pink blocks, with the top-left corner sitting at coordinates 0:26.
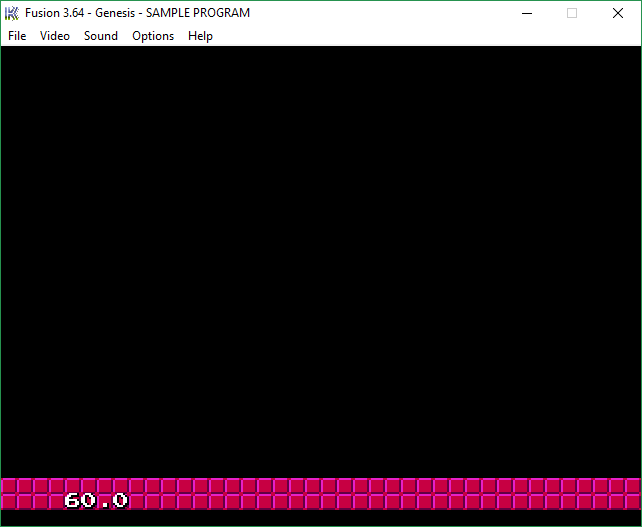
And yup…we have a floor!
Putting It Together
Just looking at blocks is boring, so I decided to draw something game-like. First I whipped up two simple tiles to use. Here they are (again upscaled so you can see them better):

Beautiful. Should be enough to create a scene that looks game-like! But before we do that let me tell you about one more thing: The background color.
So far our background has always been black. I thought I had to fill the screen with a single colored tile to change that but nope! SGDK actually lets you specify the background color separately. And this is how!
VDP_setBackgroundColor(0);
VDP_setPaletteColor(0,RGB24_TO_VDPCOLOR(0x0098e5));
First we set the index of the color we want. The Mega Drive can use 64 colors at the same time, here we want to use the very first. Then we actually have to specify what that color is supposed to be. We can use the helper function RGB24_TO_VDPCOLOR() for that. As the name implies it converts a color specified in RGB hex format into…whatever SGDK uses. I’m actually not sure. Anyway, let’s paint!
VDP_loadBMPTileData(ground.image,1,1,1,1);
VDP_loadBMPTileData(earth.image,2,1,1,1);

VDP_setPalette(PAL1, ground.palette->data);
VDP_setPalette(PAL2, earth.palette->data);

VDP_fillTileMapRect(PLAN_A,TILE_ATTR_FULL(PAL1,0,FALSE,FALSE,1),0,21,40,1);
VDP_fillTileMapRect(PLAN_A,TILE_ATTR_FULL(PAL2,0,FALSE,FALSE,2),0,22,40,7);
This should all look familiar by now. First we load the bitmap data of our tiles. Then we grab the color data and save it in our palettes. Finally we draw the tiles on the screen. And this is the result:
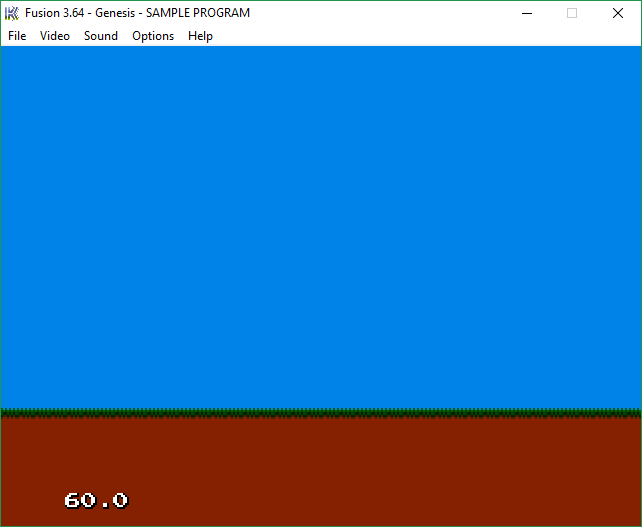
Not too shabby if I do say so myself!
Now a quick note: This is not the best way to do this. Our tiles use only 6 colors so it’s dumb to use 2 palettes. Even worse, the second tile only uses one color and that one is already defined in palette 1. It would make more sense to have both tiles use the same palette. But the thing is… I don’t know the best way to do that yet, so this way will have to suffice for now.
And that’s all I managed to get done so far. I’d like to look a bit more into palettes so hopefully I’ll have more details next time. If there are any questions or things you are curious about, don’t hesitate to let me know! Either post in the comments below or hit me up on Twitter @ohsat_games.
Check out the rest of this series!

Want To Buy Me a Coffee?
Coffee rules, and it keeps me going! I'll take beer too, though.

Related Posts
Go! Go! Pogogirl Is Coming to Mega Drive!
It is finally happening: Go! Go! PogoGirl is coming to the Sega Mega Drive!
HaxeFlixel Tutorials!
If you’ve popped over to the tutorial section recently you might have noticed that I’ve added my very first HaxeFlixel tutorial! It shows how to implement a simple, pixel-perfect 2D water shader which I used for Go! Go! PogoGirl. But a few of you might be wondering what a HaxeFlixel is. Well, it’s a 2D game framework that is as powerful as it is underrated! It runs on the (also underrated) Haxe language, is extremely well documented, open source, and has built-in functions for almost anything you’d need.
Comments
By using the Disqus service you confirm that you have read and agreed to the privacy policy.
comments powered by Disqus

