In this beginner tutorial you'll learn how to make Breakout game in HaxeFlixel from scratch!
HF Breakout 6 - Game Over
Welcome to the final part! Fittingly, this time we’ll implement a game over so that our game actually ends at some point. Let’s do it!
Game Over
Right now, if the ball leaves the screen at the bottom, nothing happens. It’s no fun having to close the entire game and start again. Also, when the game starts, the ball starts flying immediately. That’s not user-friendly. So, let’s change all that and give our game the polish it deserves!
First, create some variables to keep track of the game state:
var gameStarted:Bool = false;
var gameEnded:Bool = false;
The names make clear what they store. Let’s see them in use! At the very beginning of update(), even before the super call, add:
// Start/restart game
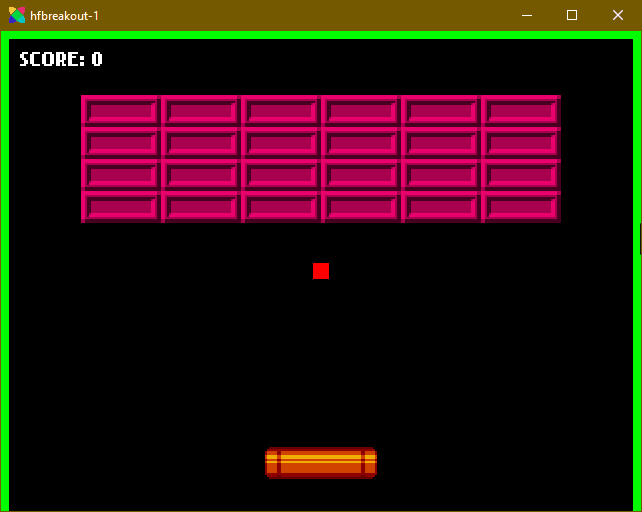
if (!gameStarted)
{
if (FlxG.keys.justPressed.SPACE)
{
gameStarted = true;
}
return;
}
if (gameEnded)
{
if (FlxG.keys.justPressed.SPACE)
{
FlxG.resetState();
}
return;
}
//...
We’re checking for input again, but this time we’re using justPressed to check if the spacebar has just been pressed. justPressed is better in this situation, because it only triggers once: the very moment a key is pressed. Even if the key is held down, it only triggers once.
If the game has not started yet, we start it. If the game has already ended, however, we want to restart the game from the beginning. We could manually reset the ball and paddle positions, reset the score, etc. But it’s easier to just call FlxG.resetState();, which, as the name implies, resets the current state.
Note that in both if-statements we have a return; at the end. This of course prevents the rest of update() from being processed, which we need. Otherwise, players could still move the paddle after the game has ended, or even before it has begun. Once gameStarted is set to true, the update loop will run normally until gameEnded is set to true. Let’s make a function that does that!
function endGame()
{
    gameEnded = true;
}
It probably seems a bit overkill to use a function just for this. So, let’s add something extra: A game over message! Once again, we’ll use a FlxText for that. Add these lines after the above:
var endMessage = new FlxText(0, 0, 0, "GAME OVER", 32);
endMessage.screenCenter();
add(endMessage);
It’s very simple. We create the text, center it on screen, then add it to the state. We just use a local variable for the FlxText object here, as we don’t need to keep track of it; When the game has ended, it can only be reset anyway.
Now for the final step: Actually ending the game. A game of Breakout ends when the ball leaves the bottom of the screen. We’ll need to constantly check for that. So, at the very end of update(), add:
// Fail
if (ball.y > FlxG.height)
{
    endGame();
}
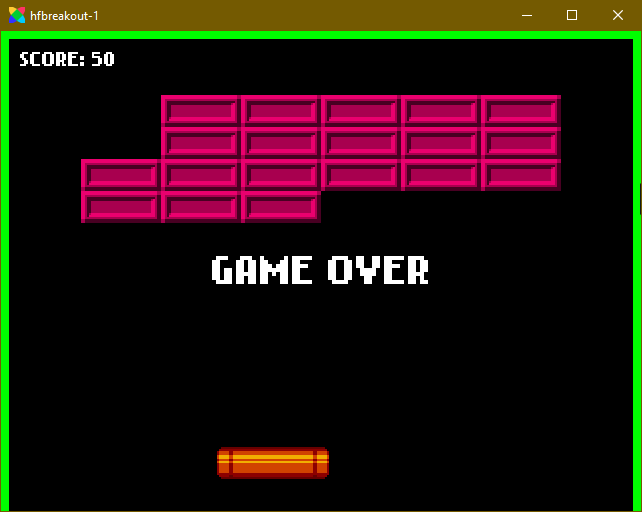
There we go! Compile the game and press space to start it. Hit a few bricks, then let the ball drop down.
Game over!
Press space and the game starts again.
Winning
Great, but right now we can only fail. The game should also end when all bricks are gone, so let’s add that! We could check for this every frame in update(), but it makes more sense to do it in hitBrick, as that function is called every time a brick is hit. At the end of that function, add:
//...
if (grpBricks.countLiving() == 0)
{
    endGame();
}
The method countLiving() of a group counts its members that are alive, meaning they have alive = true. This is the case as long as kill() hasn’t been called on them. So, once all bricks have been hit, none of them are alive, and the game ends. Woo!
Sound
We already have a full game going, but one thing is still missing: A respectable retro game needs some blips and bleeps. Again, this is something that’s easy to implement in HaxeFlixel. First, download the sound file:
Click here to download the sound file
Put it in assets/sounds. Next, we’ll need a variable of a new type: FlxSound. As the name implies, it stores a sound effect. At the top of the PlayState, add:
var sndHit:FlxSound = null;
Then, somewhere in create, we need to load the sound. For that we’ll use a method of FlxG:
// Sound
sndHit = FlxG.sound.load(AssetPaths.hit__wav);
That’s right, sound assets are also stored in AssetPaths! But of course you could also enter the path manually.
Now we have a sound saved in the variable. Let’s play it whenever the ball hits the paddle or one of the bricks. So, in both hitBrick and hitBall, add the line:
sndHit.play(true);
Simple enough! The argument indicates whether the sound should restart when it’s already playing. In our case we want this. If the ball hits two bricks in quick succession, the second brick might not play a sound if the first one hasn’t finished yet. So, we pass in true to tell HaxeFlixel to force the sound to play again!
And that is it! Now we have a full game with a beginning, a gameplay loop, and an ending, accompanied by bleeping noises. Now that’s classic video gaming!
Conclusion
I hope you enjoyed this series. HaxeFlixel makes it easy to create games and this tutorial only scratches the surface of what you can do with it. I will make more series like this one covering other genres. I will also make one-off, bite-sized tutorials on cool features and advanced techniques, so stay tuned!
Of course, our game can still be improved. Some suggestions:
- Give bricks multiple colors. Use the
colorproperty for that. - Add more sound effects. Maybe a nice, satisfying one when a brick is hit?
- Give players even more control over the ball direction. Right now it’s hard to hit the ball straight up, as you basically need a pixel-perfect hit with the center of the paddle.
- Implement a lives system to give players multiple tries.
Of course there are many more things one can do. If you come up with something cool, make sure to share it in the comments below!
Thanks for reading, be excellent to each other, and party on!
If you have any questions, comments or criticism, post them in the comments below or reach out to me on Twitter @ohsat_games!
Download the Project Files!
All patrons on Patreon get the complete source code for this tutorial, as well as other perks such as early access! And Patreon support also ensures that I can keep working on tutorials like this one. Become a Patron!Just Want to Buy Me a Coffee?
Check out the rest of this tutorial series!
Comments
By using the Disqus service you confirm that you have read and agreed to the privacy policy.
comments powered by Disqus