HaxeFlixel Crash Course: Make a Pong Game in Under 1 Hour


HaxeFlixel is a very powerful framework and my personal favorite. However, it’s still relatively unknown, which is unfortunate. So, in order to show off how kickass HaxeFlixel can be, I decided to create a crash course that’ll show you how to create a 2-player Pong game in less than an hour!
Before we begin, make sure that you’ve installed and set up HaxeFlixel as described on the official homepage. It’s all fairly straight-forward.
All ready? Then let’s get to it! Create a new HF project by opening up a command prompt in the location of your choice and typing:
flixel tpl -n "hfpong"
Now open the project in Visual Studio Code (highly recommended) or whatever IDE you want to use and let’s get coding!
The Ball
Open up the file PlayState.hx in the source folder. As the name implies, this will be where our gameplay code lives. The Main.hx file contains the entry point for the program, but in HaxeFlixel, the real action happens inside game states. A PlayState is generated by default and that’s where all our code will go!
Let’s start by creating a ball, which, in classic Pong fashion, will be a square. Add a new member variable to the class PlayState:
var ball:FlxSprite;
The type FlxSprite is defined by HaxeFlixel and specifies a game object or entity with a graphic, position, velocity and other things. Most of the objects in our game will be of this type.
Note: Whenever you want to use a new type, you’ll have to import it at the top of the file. Luckily, VSCode usually takes care of that for you automatically. If for some reason it doesn’t, just click on the type (which should have a red squiggly line under it), click the light bulb that appears to the left and select the appropriate import command!
Now jump into the create() function. This function is called only once, when the current gamestate is created. Thus, this is where we create and set up everything we’ll need for our game. Create a ball with:
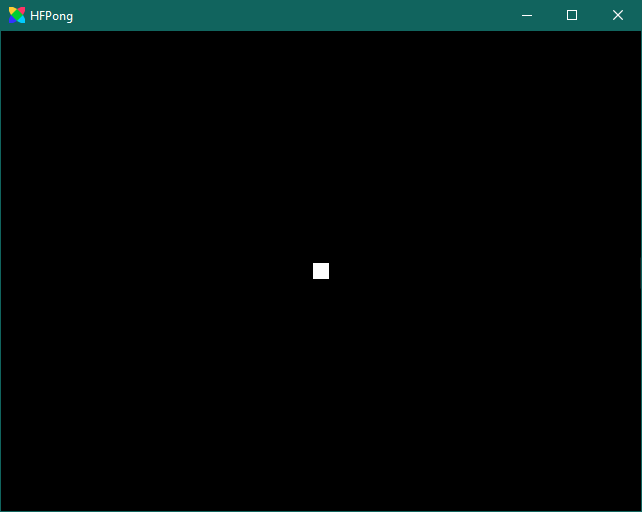
ball = new FlxSprite();
This will create a ball at position (0,0) using a placeholder sprite. But we want to create our own fancy graphics! Or, well, our own graphics at least. And we won’t even have to fire up Photoshop, because HaxeFlixel has some basic drawing functions built in:
ball.makeGraphic(16, 16, FlxColor.WHITE);
This will create a white square that’s 16x16 pixels big. FlxColor is a class that contains a number of pre-defined color values, which is really convenient!
Another thing that’s convenient is a built-in function that centers objects on the screen. Use it on the ball:
ball.screenCenter();
And, finally, add the ball to the current state so that it becomes visible:
add(ball);
Note: If you don’t add objects to the state, they won’t exist.
Now compile the game and you should see our ball-square sitting in the center of the screen!
Walls
Now let’s add some walls to the top and bottom of the screen to keep the ball within the playing field. Add two variables at the top of the PlayState class:
var wallTop:FlxSprite;
var wallBottom:FlxSprite;
And then create them both in create() after the ball code:
// Create the walls
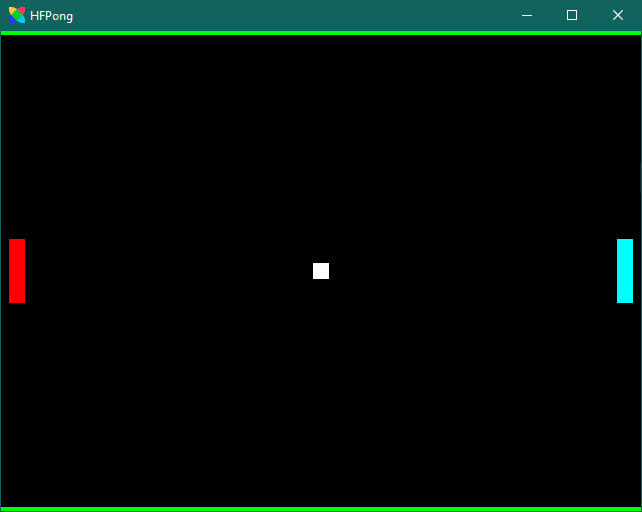
wallTop = new FlxSprite(0, 0);
wallTop.makeGraphic(FlxG.width, 4, FlxColor.LIME);
wallTop.immovable = true;
add(wallTop);
wallBottom = new FlxSprite(0, FlxG.height - 4);
wallBottom.makeGraphic(FlxG.width, 4, FlxColor.LIME);
wallBottom.immovable = true;
add(wallBottom);
Once again we’re using makeGraphic to create the walls, but we’re coloring them a bright green. This time we also define the position of the FlxSprite directly in the constructor, by passing in the values. We’re also introduced to FlxG, which is a global helper class that helps us deal with cameras, sound, input, collision and other things. In this case we use the properties width and height (which contain the width and height of the game window), to define the width of the walls and to position the bottom wall at the bottom of the screen.
We also set the immovable property to true, which will be needed for collision handling later. And don’t forget to add both walls to the state!
Paddles? That’s a Paddlin'
Finally, a Pong game needs paddles, so let’s make some! Once again, add the variables:
var paddleLeft:FlxSprite;
var paddleRight:FlxSprite;
And then create the paddles with the usual functions:
// Create the paddles
paddleLeft = new FlxSprite(8, 0);
paddleLeft.makeGraphic(16, 64, FlxColor.RED);
paddleLeft.screenCenter(FlxAxes.Y);
add(paddleLeft);

paddleRight = new FlxSprite(FlxG.width - 24, 0);
paddleRight.makeGraphic(16, 64, FlxColor.CYAN);
paddleRight.screenCenter(FlxAxes.Y);
add(paddleRight);
You’ll notice that we’re passing an argument into screenCenter this time. FlxAxes.Y tells HaxeFlixel to center the sprite vertically on the screen. Other possible values are FlxAxes.X, which will center it horizontally, or FlxAxes.XY, which will center it on both axes. FlxAxes.XY is the default value, which is why we didn’t have to pass it in when we centered our ball on the screen.
Alright, now we’ve got walls, a ball and two paddles. Our game certainly looks like Pong now! Now let’s add some gameplay to make it feel like Pong too. We’ll start by letting players move the paddles around.
Moving the Paddles
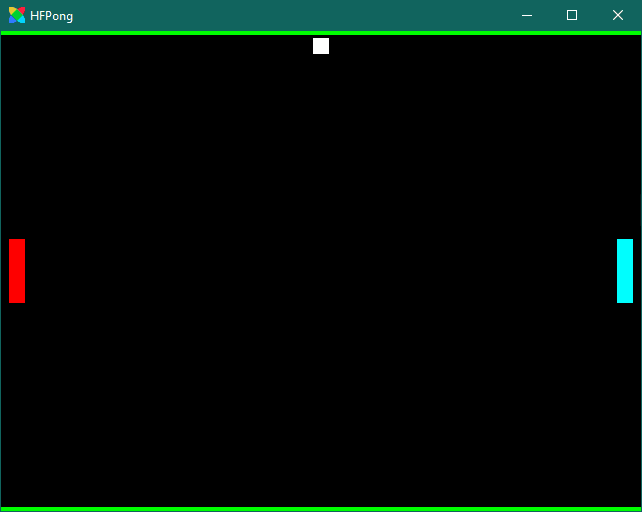
To deal with the movement of the paddles we’ll jump out of create() and into update(). This function is automatically called every frame and is thus used for the main gameplay loop. In our case, we’ll check whether a button has been pressed and move the paddles accordingly. The left paddle will be controlled with W and S on the keyboard, while the right paddle will use the cursor keys. So, below super.update(elapsed); start by adding:
if (FlxG.keys.pressed.W && paddleLeft.y > wallTop.height)
{
    paddleLeft.velocity.y = -200;
}
This code will move the left paddle upwards when the W key is pressed on the keyboard. Let’s dissect it!
First, we meet our helper class FlxG again, which we use to check for input; more specifically, we check whether W has been pressed on the keyboard. The keys property contains other useful functions like anyJustPressed or justReleased, to name a few. We use pressed to see if the W key is currently being pressed; and since we’re calling this inside the update function, this check will be performed every frame.
Then we check the current position of the left paddle. If it’s already touching the upper wall, we don’t want to move it further upwards; in other words, we only want to move it as long as it’s below the upper wall. In HaxeFlixel, the top edge of the screen has the value 0 and the bottom edge FlxG.height (which is 480 in our case). So, to see whether the paddle is below the wall, we check whether paddleLeft.y is greater than the bottom edge of the top wall. By the way, the x and y properties of objects denote the top-left corner of the object.
If both of these conditions are fulfilled, we actually move the paddle. We do this by modifying the velocity property that all FlxSprites have. In our case, we set the y-velocity to -200, which will move the paddle upwards (because the top edge is 0, remember?). Although we do set this every frame (as long as the conditions are fulfilled), we wouldn’t have to do this; It’s enough to set the velocity once. HaxeFlixel will then move the sprite according to its velocity each frame, until we set the velocity back to 0. It doesn’t hurt to set the velocity every frame though.
Okay, with that out of the way, let’s finish up the movement code for the left paddle. Add two more if-statements and you’ll end up with this:
if (FlxG.keys.pressed.W && paddleLeft.y > wallTop.height)
{
    paddleLeft.velocity.y = -200;
}
else if (FlxG.keys.pressed.S && paddleLeft.y + paddleLeft.height < wallBottom.y)
{
    paddleLeft.velocity.y = 200;
}
else
{
    paddleLeft.velocity.y = 0;
}
The second condition is the same as the first, just the other way around: If S is pressed and the paddle is above the bottom wall, move the paddle downwards.
Finally, if neither W nor S are pressed, we set the paddle’s y-velocity to zero. This is necessary, because as I said, HaxeFlixel automatically applies the velocity to sprites until we take it away. A sprite’s velocity is not reset to 0 each frame, and objects also don’t become slower automatically like they would in physics engines. So, without the else statement, the paddle would keep moving even if the player has released the key.
But we’re not done yet: We have to give player 2 a chance as well. Apart from the keys pressed, the code is identical:
if (FlxG.keys.pressed.UP && paddleRight.y > wallTop.height)
{
    paddleRight.velocity.y = -200;
}
else if (FlxG.keys.pressed.DOWN && paddleRight.y + paddleRight.height < wallBottom.y)
{
    paddleRight.velocity.y = 200;
}
else
{
    paddleRight.velocity.y = 0;
}
And there we go! Compile the game and both players should be able to move their paddles. We’ve almost got a proper game now! But the ball will need to move, so let’s get that working.
Bouncing the Ball
Before we send the ball flying, let’s take care of collision detection so that it doesn’t immediately leave the screen. While this is usually a very complex topic, HaxeFlixel comes equipped with a very robust collision system and some helpful functions that make it really, really easy to use. In fact, we’ll only be using one single function for this step!
But before we get to that, let’s set something up that will make things easier and more efficient. At the top of PlayState, define a new variable:
var walls:FlxGroup;
The type FlxGroup is very useful and can be found all throughout the HaxeFlixel codebase. It’s basically not much more than a fancy array that allows you to easily group sprites (and other objects) together, but it’s very powerful if used correctly. Let’s see how it works by grouping our walls! In create(), after we’ve created our two walls, add this:
walls = new FlxGroup();
walls.add(wallTop);
walls.add(wallBottom);
We simply create a new group, then add our walls to it. It’s easy to forget to actually create the group with new, so keep an eye out!
Okay, so what purpose does this serve? It actually helps us with collision. Because now we only need one single line of code to let our ball collide with both walls. In update(), below all the code that checks for player input, add the following line:
FlxG.collide(ball, walls);
And that is all we need to enable collisions between the ball and the walls! FlxG.collide takes two objects, compares their positions and automatically separates them if they overlap. However, instead of passing in a single object, you can also pass in a FlxGroup, and HaxeFlixel will then automatically check the collision for each object in that group! We could have made two calls to FlxG.collide, passing in topWall and bottomWall separately, but that would be redundant. Plus, it’s better for performance to pass in a group of objects. It might not matter much right now, as we’re only checking three objects, but when you code a bullethell shooter both you and your PC will be thankful for FlxGroups, believe me.
I’m sure you’re eager to try out this new collision stuff, right? Well, unless the ball actually moves, nothing will happen. So, hop back into create() and, after creating the ball, add the following two lines:
ball.velocity.y = 200;
ball.elasticity = 1;
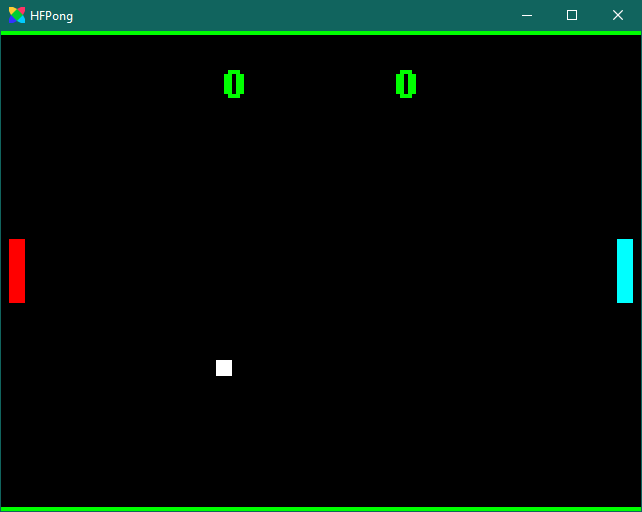
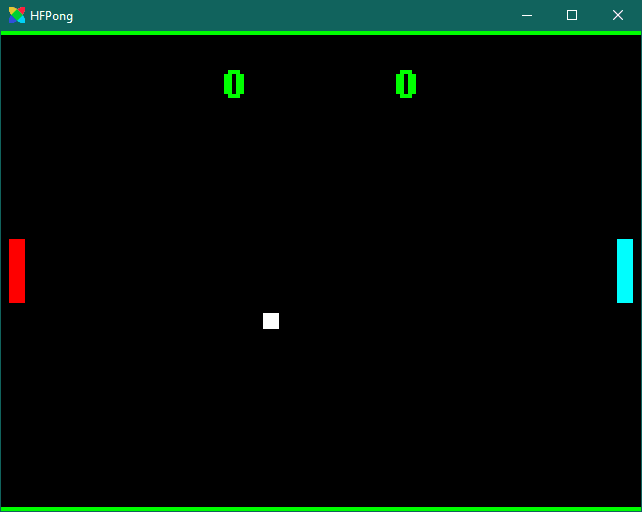
We set the ball’s y-velocity to 200 so that it moves downwards at the start of the game. But what’s elasticity? It’s another very useful property of FlxSprite! By setting it to 1 (the maximum value), we’re telling HaxeFlixel that the sprite should bounce when it collides with something. So now, when the ball hits a wall, it will bounce back and keep its speed! Compile the game and see for yourself:
By default, all sprites have an elasticity of 0, meaning they just stop when they collide with something else. A value between 0 and 1 will make the sprite bounce, but lose speed while doing so. It’s a very useful feature that saves quite a few lines of code!
Paddlin' the Ball
Let’s keep this collision train rolling by adding collision with the paddles as well! As with the walls, we’ll put both paddles into a group to make things more efficient. So define a group…
var paddles:FlxGroup;
…then create it in create() and add the paddles:
paddles = new FlxGroup();
paddles.add(paddleLeft);
paddles.add(paddleRight);
Of course you can only add the paddles if you’ve actually created them, so add the above code after you’ve created the paddles and their graphics.
Now just call FlxG.collide(ball, paddles) in update() after our previous call to FlxG.collision and you’ll have collision! But right now the ball is just bouncing up and down, meaning we can’t test it. In create() we just added the line ball.velocity.y = 200;, so go there and add another line above (or below) it:
ball.velocity.x = -200;
Now the ball will fly to the left when the game starts! So compile the game, intercept the ball, and …

…you’ll notice that the ball knocks the paddle off the screen. That’s not supposed to happen.
Remember when we set the walls to be immovable? This is the reason why. When the immovable property of a sprite is set to true, HaxeFlixel won’t move it when it’s processing collisions. We wanted the walls to remain in place, so we set immovable = true. And we don’t want the paddles to fly off the screen either, so in create() add:
paddleLeft.immovable = true;
paddleRight.immovable = true;
And now paddle collisions should work the way we want: The paddles stay in place, while the ball bounces off.
By the way: If two objects collide that both have immovable set to true, nothing will happen, as HaxeFlixel won’t touch either of the objects!
Score
Now we can actually somewhat play the game, but there’s not much to it yet; if the ball leaves the screen it’s gone, and nobody gains any points. Let’s change that and finish off this game!
To draw the current scores of the players to the screen we’ll use a new type called FlxText. This is actually just an extension of FlxSprite and allows us to easily render text on the screen.
To implement scoring, first define four new variables at the top of PlayState:
var scoreLeft:Int = 0;
var scoreRight:Int = 0;
var scoreDisplayLeft:FlxText;
var scoreDisplayRight:FlxText;
The two integers will store the actual score value of each player, and the FlxText objects will be used to draw them to the screen. For that, we have to create them, which we’ll of course do in create():
// Score displays
scoreDisplayLeft = new FlxText(220, 32, 100, "0", 32);
scoreDisplayRight = new FlxText(320, 32, 100, "0", 32);

scoreDisplayLeft.color = FlxColor.LIME;
scoreDisplayRight.color = FlxColor.LIME;

scoreDisplayRight.alignment = FlxTextAlign.RIGHT;

add(scoreDisplayLeft);
add(scoreDisplayRight);
Let’s step through one by one. First, we create the FlxText objects. The signature of the constructor is as follows:
new (X:Float = 0, Y:Float = 0, FieldWidth:Float = 0, ?Text:String, Size:Int = 8)
X and Y determine the position of the top-left corner of the text. FieldWidth defines the width of the text field, which is relevant for automatic linebreaks and things like that. Text is the default text to be rendered and Size specifies the font size. It’s all fairly straightforward stuff.
Next, we color both texts lime green by modifying the color property. This property is actually defined by FlxSprite, so you could use it to color the ball and paddle as well.
Finally, we set the alignment of the right score text to FlxTextAlign.RIGHT which will make things look a bit cleaner in the end (although this step isn’t necessary).
Oh, and of course you have to add the two FlxText objects to the state!
This will render our scores to the screen, but of course they will never be updated. To fix that we’ll create a new function that will update both FlxText objects with the current scores of the players! Below the update() function (or anywhere else within the PlayState class, really), define the following function:
public function updateScoreDisplays()
{
    scoreDisplayLeft.text = Std.string( scoreLeft  );
    scoreDisplayRight.text = Std.string( scoreRight );
}
The text property of a FlxText object is of type String and contains the text to be rendered. We update it by passing in the current scores of the players. However, as these values are stored as integers, we have to convert them to strings using Std.string(). Std is the standard library of the Haxe language and contains many basic helper functions like that.
Changing the text property of a FlxText will automatically update it, so we won’t have to do anything else in this function!
Now for the final step: Letting players earn points. If the ball touches the left edge of the screen, the right player will earn a point and vice-versa. To make this possible we’ll have to keep track of the ball’s position each frame, meaning we’ll implement this code in update(). At the very end of that function, after our collision checks, add:
// Check for wins
if (ball.x <= 0)
{
    scoreRight += 1;
    updateScoreDisplays();
    ball.screenCenter();
}
else if (ball.x > FlxG.width)
{
    scoreLeft += 1;
    updateScoreDisplays();
    ball.screenCenter();
}
If the ball touches the left edge of the screen (ball.x <= 0) the right player earns a point. Then we update the score displays and finally place the ball back in the center of the screen so that the game can continue. If the ball leaves the screen to the right, the left player earns a point and the same things happen.
And there you go, you now have a fully functional Pong game for two players!
Conclusion
In this tutorial you learned how to make a fully functional Pong game from scratch. And thanks to the powerful features of HaxeFlixel, such as the built-in collision system, groups, elasticity and so on, it was pretty easy, wasn’t it? I’ve tried a lot of game engines and frameworks but HaxeFlixel ended up as my absolute favorite, and I hope I was able to show off a few reasons why that is.
This tutorial is barely scratching the surface of what HaxeFlixel can do, and I’d be more than happy to create more like it. If you want to see that happen, please let me know! I’m currently gauging interest, and if I get enough positive feedback I plan to make these tutorials a regular feature. So hit me up on Twitter, post in the comments below or really show your support by joining my Patreon or buying me a coffee!
Be excellent to each other, and party on!
If you have any questions, comments or criticism, post them in the comments below or reach out to me on Twitter @ohsat_games!

Want To Buy Me a Coffee?
Coffee rules, and it keeps me going! I'll take beer too, though.
Check out the rest of this tutorial series!
Comments
By using the Disqus service you confirm that you have read and agreed to the privacy policy.
comments powered by Disqus