Pixel-Perfect 2D Water Shader


Update: Mar 7th 22 - Made the shader code a bit cleaner to prevent issues with some graphics cards that are more strict about implicit type conversions.
As you may have read in my latest devlog, I recently implemented a pixel-perfect water shader in Go! Go! PogoGirl. Since then I’ve been asked to write a tutorial on how I did it, so here it is! I hope you’ll find it helpful.
A quick note before we start: This method only properly works on Desktop so far, at least as far as I know.
Okay, let’s get to it! First, create a new project. In Main.hx, set the size of the FlxGame to 320 x 180. Then, in the project.xml file, set the Desktop-specific window settings as follows:
<window if="desktop" width="960" height="540" fps="60" orientation="landscape" fullscreen="false" resizable="false" />
Also uncomment the line about flixel-addons. Finally, download this image and plop it into the assets folder of your project. Then load and add the image in your PlayState:
var bg = new FlxSprite();
bg.loadGraphic(AssetPaths.bg__png);
add(bg);
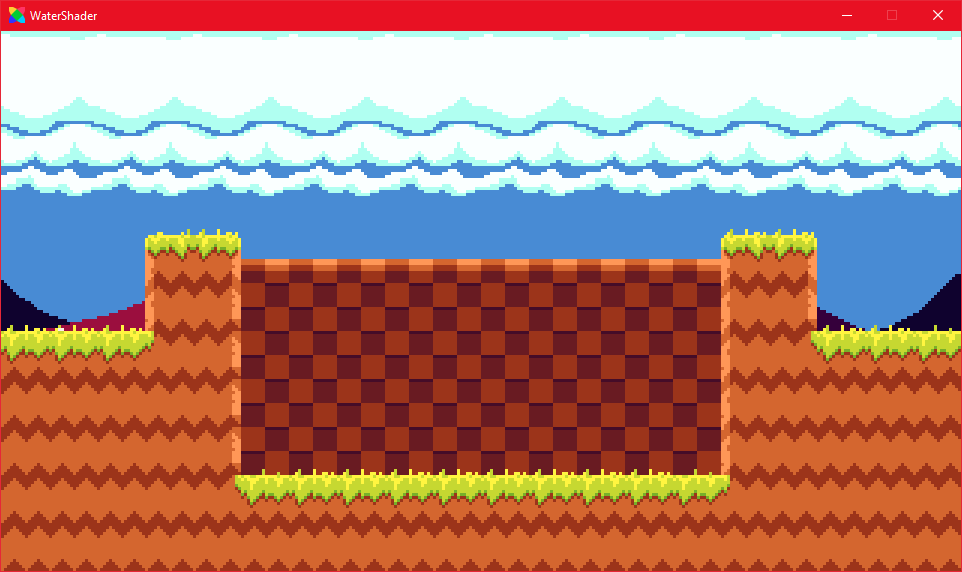
If you compile the game project now you should see a scene from Go! Go! PogoGirl with an empty pool. So far so good!
Shades of Shaders
The water effect is achieved using the magic of shaders, so the first step is to think about how best to implement a shader. We want the shader to be applied to a certain area of the screen (our pools of water) so that everything drawn there is distorted. Luckily, HaxeFlixel has a very good built-in class to take care of that for us: FlxShaderMaskCamera. This is a camera that applies shaders to areas on the screen defined by FlxSprites we pass into it. The cool thing here is that the camera position is taken into account; so the effect will always just apply to our pool, no matter where the camera is! We’ll see how that works in practice in a second, but first we actually need a shader.
Here is the water shader I cobbled together. Note that I am by no means any type of shader expert. I’m barely a shader beginner. So there might be a better solution to achieve this effect, but this worked for me and it might work for you!
class Displace extends FlxShader
{
    @:glFragmentSource('
        #pragma header

        uniform float waves;
        uniform float uTime;

        void main()
        {
            //Calculate the size of a pixel (normalized)
            vec2 pixel = vec2(1.0,1.0) / openfl_TextureSize;

            //Grab the current position (normalized)
            vec2 p = openfl_TextureCoordv;

            //Create the effect using sine waves
            p.x += sin( p.y*waves+uTime*2.0 )*pixel.x;

            //Apply
            vec4 source = flixel_texture2D(bitmap, p);
            gl_FragColor = source;

        }'
    )

    public function new(Waves:Float)
    {
        super();
        this.waves.value = [Waves];
    }
}
The variable waves that you pass into the shader affects the intensity of the effect.
Next, define three new variables in your PlayState:
public var dispShader:Displace;
public var waveTimer:Float = 0;
public var shaderCam:FlxShaderMaskCamera;
Now, let’s set up this fancy new FlxShaderMaskCamera. In the create function of your PlayState, add the following:
dispShader = new Displace(80);
shaderCam = new FlxShaderMaskCamera(dispShader);
FlxG.cameras.reset(shaderCam);
We’re creating an instance of the shader (with a wave intensity of 80), pass that into the new camera, then we call FlxG.cameras.reset. This will remove all other cameras apart from our new one, which will now be used as the default camera. Don’t worry, FlxShaderMaskCamera extends FlxCamera so you can use it just like you would a regular camera!
Next we’ll need to tell the camera which areas on the screen should have the shader applied. To do this, we simply create a sprite mask at the position we want and pass it into the camera:
var mask = new FlxSprite(80, 84); //The position of our pool
mask.makeGraphic(160, 64, FlxColor.WHITE);
shaderCam.addMaskObject(mask);
Note that you do not need (and probably shouldn’t) add the sprite mask to your stage! It only needs to be passed into the camera for the effect to work. And as it is never actually drawn on screen, it doesn’t need to be more than a simple white rectangle. Also note that you can add more than one mask object to the camera!
We already have an effect going now, but we’ll need to do one last thing to actually animate the waves. In the update function of your PlayState, add this:
_waveTimer += elapsed;
if (_waveTimer > Math.PI)
    _waveTimer -= Math.PI;
dispShader.uTime.value = [_waveTimer];
This will continuously animate the wave effect while keeping waveTimer within range.
And that’s actually pretty much it! Compile the game and see the wave effect in action.
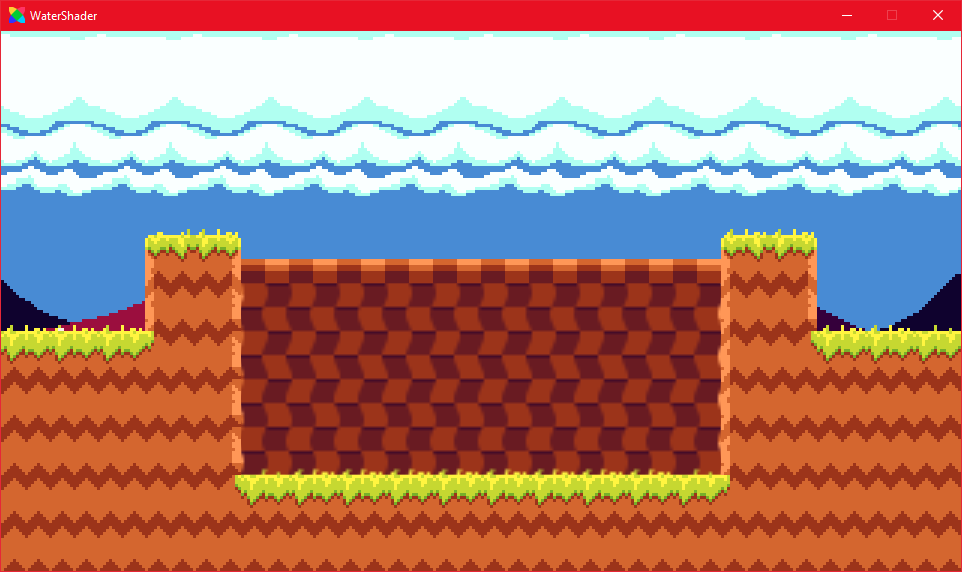
Toning it Down
If the effect looks good to you, then congratulations: you’re done! However, if you’re making a game with chunky pixel graphics, then you might notice that the shader effect is not pixel-perfect. There is a simple reason for that: The game has a native resolution of 320 x 180. Our window, however, is thrice that size (or even more if you’re playing fullscreen), so the game is of course scaled up. But the thing is: shaders only care about the pixels on screen, so, as far as shader is concerned, each pixel of our game is actually 3 pixels. This leads to our nice, chunky pixels being ripped apart by the shader.
Luckily, there is a hack/workaround to get shaders to only use the ‘actual’ pixels. I’m calling it a hack because I’m not quite sure why it works, but trust me that it does work.
I got this solution from AustinEast, who has a full example of it online. Basically, you do the following:
- In
project.xml, set the Desktop-specific window size to the native resolution of your game (in our case 320 x 180) and make sure thatresizableis set tofalse:
<window if="desktop" width="320" height="180" fps="60" orientation="landscape" fullscreen="false" resizable="false" />
Then, in Main.hx, where you instantiate your FlxGame, do this:
addChild(new FlxGame(0, 0, PlayState));
FlxG.game.setFilters([new ShaderFilter(new FlxShader())]);
FlxG.game.stage.quality = StageQuality.LOW;
FlxG.resizeWindow(960, 540);
The game will now use the size defined in project.xml, which is our native resolution. Then we apply a Shader filter to the FlxGame, which is the magic step in this solution. This will force the game to run at the resolution we originally defined, no matter how big the window is. We can now use FlxG.resizeWindow to increase our window size without affecting the resolution…for some reason. However, OpenFL will helpfully try to smoothen the graphics, which will make things very blurry. But by setting the stage quality to LOW we can keep it crisp and pixely!
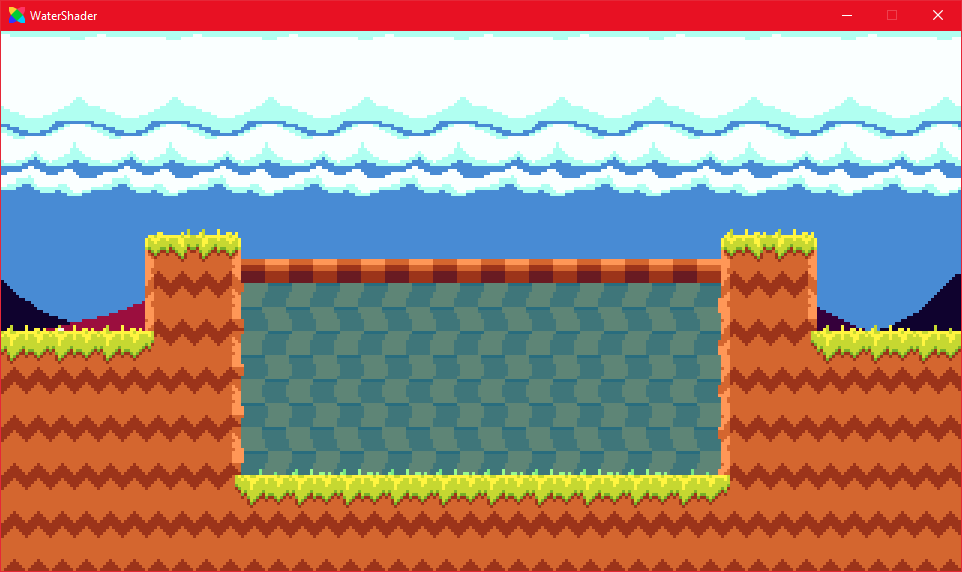
And if you want, you can add a translucent blue sprite on top of the mask to color the water blue:
var blue = new FlxSprite(mask.x, mask.y);
blue.makeGraphic(Std.int(mask.width), Std.int(mask.height), FlxColor.CYAN);
add(blue);
That’s all there is to it. Compile again and you have pixel-perfect, rippling water!
Thanks to AustinEast for the workaround. He has made some really cool games that I’d recommend checking out here! As a fan of Wave Race on the N64, I especially liked Wet Jet Racing.
Tutorials like this are made possible through the awesome people on my Patreon. If you’re a patron, you can download the project files for this tutorial and many others!
By the way, have you ever wanted to code your own Mega Drive game? I’ve got tutorials for that too!
Thanks for reading, be excellent to each other and party on!
If you have any questions, comments or criticism, post them in the comments below or reach out to me on Twitter @ohsat_games!

Want To Buy Me a Coffee?
Coffee rules, and it keeps me going! I'll take beer too, though.
Check out the rest of this tutorial series!
Comments
By using the Disqus service you confirm that you have read and agreed to the privacy policy.
comments powered by Disqus