Megatiler 1 - Tiles
NOTE:
This tutorial is most likely not compatible with versions of SGDK above 1.70.
Unfortunately, I simply do not have the capacity or ability to update them right now. Read more about it here. Sorry.


Welcome back to another Mega Drive project tutorial! This time around we’ll create a top-down game, where the goal is to collect enough coins and then reach the exit of the level. We’ll learn how to work with simple tilemaps, how to progress from one level to the next and other things!
If this is your first Mega Drive tutorial on this site, then I highly recommend going back and doing the previous tutorials, starting with Megapong. These tutorials are meant to be finished in order, so I won’t be explaining things covered in the previous tutorials in as much detail. That said, if you’re confident in your SGDK abilities, feel free to jump in wherever you want!
Tiles
Okay, let’s get some basics taken care of. First of all: What is a tilemap? The name implies that it’s a map of tiles, but that’s not that much of an explanation. A tile is essentially a square, fixed-size chunk of graphics that you use to build full images. A tilemap contains the info on which tile is supposed to go where on the screen. It’s a map of tiles.
You might remember that the Mega Drive natively uses tiles to draw graphics to the two background layers. And this is going to be very handy for our purposes! We’ll leverage this built-in tile functionality to quickly create levels for our top-down game. Don’t worry if you’re a bit confused, things will become clear soon enough.
A final note: The latest version of SGDK (1.6) introduces a new resource type called MAP, which could be used for our purposes. However, in this tutorial we are doing it oldschool, as it is very useful to know the basic principles of dealing with tilemaps. I’ll most likely make a tutorial on this new resource type at a later date. But for now, let’s get into it!
Resources
As usual, first we’ll need some graphics to put on the screen. Download the file below and unzip it into the res folder of your project.
Click HERE to download the file
If you take a look at the file you’ll see that it consists of 3 tiles: Grass, a block, and a door. We’ll use these 3 tiles to construct our levels. But before we get started, let’s quickly load the tiles (as well as their palette) into our game.
Add the file to the resources.res file:
IMAGE floortiles "tilesheet.png" 0
Then load the tiles into VRAM:
VDP_loadTileSet(floortiles.tileset, 1, DMA);
VDP_setPalette(PAL1, floortiles.palette->data);
Our tiles will now be available at the indexes 1-3. Now, let’s get building!
Tilemaps
As I’ve said, we’ll use tilemaps to build our levels. In order to do that, we’ll need to decide on how to save and format them. We will keep it very simple for now. As our game will be a small top-down game, we are going to store our tile information in a single 2-dimensional array. This array will store integers, with each integer referring to one tile. We can then iterate through the array and use these values to draw our map on screen. Let’s see how that works in practice!
Copy the following chunk at the top of main.c:
u8 level1[8][8] = {
    {0, 0, 0, 0, 0, 0, 0, 0},
    {0, 0, 0, 0, 0, 0, 0, 0},
    {0, 0, 0, 0, 1, 0, 0, 0},
    {0, 0, 0, 1, 1, 0, 0, 0},
    {0, 0, 0, 0, 1, 0, 0, 0},
    {0, 0, 0, 0, 1, 0, 0, 0},
    {0, 0, 0, 0, 1, 0, 0, 0},
    {0, 0, 0, 0, 0, 0, 0, 0}
};
As you can see it’s an array containing 8 other arrays, which in turn contain 8 integers. The 0 values indicate empty tiles (which will be represented by grass) and the 1 values will be the walls. This is the blueprint of what our level will look like.
The advantage of using a 2-dimensional array is that it’s rather intuitive, as it basically gives us a simple coordinate system to work with. As we have an array within an array, we use the syntax array[a][b] to access the integer values; a referring to which sub-array we want to access, and b being the value in that sub-array. It’s basically like using x and y values in a coordinate system!
WARNING: Please note that the order of coordinates is reversed. In a coordinate system we usually first specify the x and then the y value. However, the a value in array[a][b] is actually the y value, as it refers to which sub-array we want; and in our array chunk above, that’s the row that we want. So, in order to access the top-most 1 value in the array, you would have to access level1[2][4] (third row, fifth value). This is easy to mess up, so keep that in mind!
Anyway, we now have the blueprint of our level. Let’s build it and put it on screen! We will do that in a new function we’ll call loadLevel():
void loadLevel(){
    //Load the level
}
This function will iterate through our array, read the values and then put the corresponding tile on the screen. Let’s start with the iteration:
void loadLevel(){
    u8 x = 0;
    u8 y = 0;
    u8 t = 0;

    for(y = 0; y < 8; y++){
        for (x = 0; x < 8; x++){
            t = level1[y][x];
        }
    }
}
We use two variables and a nested for-loop to crawl through our array and dig out the value we need. This value is then saved in the variable t. Note the inverted coordinates! We first access the row (the y-coordinate) and then the column (the x-coordinate). You’d be surprised how easy that is to forget. Believe me, I did while writing this post.
Alright, t now holds the value of the tile that we want to draw. How do we draw it? Well, remember when I said we’d use the Mega Drive’s built-in tile functionality? That’s gonna be real handy now, because we will simply map our value to the screen one-to-one.
//...
t = level1[y][x];
VDP_setTileMapXY(BG_B, TILE_ATTR_FULL(PAL1, 0, FALSE, FALSE, t + 1), x, y);
//...
We use VDP_setTileMapXY to draw a single tile at a specific (x,y) coordinate. We tell the function what tile to get from the VRAM stack by passing in t+1. The +1 is important, as our lowest tile value is 0, but our tiles are stored at position 1 and up in VRAM!
You could of course rework the map so that the empty grass tiles don’t have the value 0 but the value 1. Then you could simply pass in t to VDP_setTileMapXY and everything would be truly 1:1. However, it’s very common to use 0 as the “empty” value in tile maps, so that’s what I’m using here. However, in the end you can do what you want, as long as your system works!
Also note that this time, we pass in x and y in the usual order. We only have to invert them when directly accessing our array.
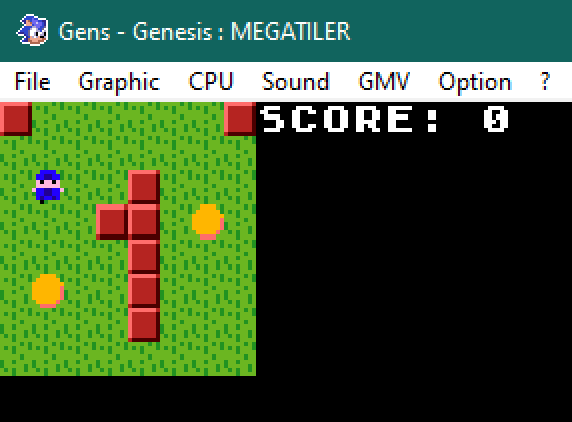
Okay, that’s pretty much it! Call loadLevel() in the main function, compile the game and say hello to our level!
Isn’t it beautiful? And if you look at our array, you’ll see that it really is mapped 1:1. Change a value in the array, and it will change on the screen (after a recompile, of course). This is what makes tilemaps so useful, as you basically create accurate blueprints and let the code handle the actual level construction. You can also increase the size of the level, by the way! Just expand the array and update the values in loadLevel().
Final Words
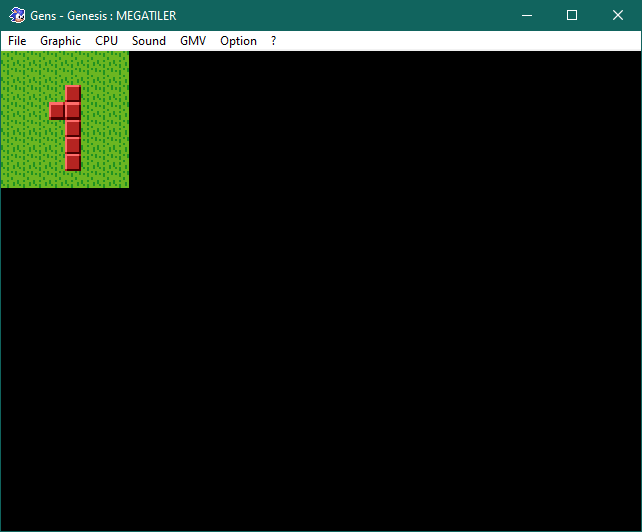
Two more things before we wrap up. First of all, you’ll notice that the graphics in our level are very small. That is because the Mega Drive works with tiles of 8x8 pixels, which really is pretty small. In most games, you would instead work with level tiles of 16x16 pixels, meaning that each level tile would equal four graphic tiles. As I’m trying to keep it simple and just teach the basics of tile-based game development, I’ll stick with the 1:1 mapping for now.
Secondly, in a real game, you most likely wouldn’t build levels by assembling arrays manually. Instead, you’d use a tile editor and then import the resulting files into your game. I won’t be going into that here, as our levels will be very simple. But if you plan on making a bigger game with more complex levels, I’d recommend either creating your own tile editor, or get something like Tiled and kajigger that to output simple C arrays that you can then parse in your game.
Anyway, that’s it for this time. Happy coding, be excellent to each other and party on!
If you've got problems or questions, join the official SGDK Discord! It's full of people a lot smarter and skilled than me. Of course you're also welcome to just hang out and have fun!

Want To Buy Me a Coffee?
Coffee rules, and it keeps me going! I'll take beer too, though.
Check out the rest of this tutorial series!
Comments
By using the Disqus service you confirm that you have read and agreed to the privacy policy.
comments powered by Disqus