Creating a Simple Menu
NOTE:
This tutorial is most likely not compatible with versions of SGDK above 1.70.
Unfortunately, I simply do not have the capacity or ability to update them right now. Read more about it here. Sorry.


What would a game be without menus? Well it would still be a game, just with less options I suppose. But you know what I mean, menu screens are an important feature of pretty much every game, from platformers to RPGs. So I’d like to show you a simple way of creating menus for your Mega Drive game! Note that there are many ways to create menus and there is no single ‘correct’ one. This is simply the approach I thought would be the most simple for beginners. Let’s get into it!
Setting Up
First we’ll create a struct type called Option to make things easier for us. This type will represent a single option in our menu and will store the label, as well as its x- and y-position on the screen.
typedef struct
{
    u16 x;
    u16 y;
    char label[10];
} Option;
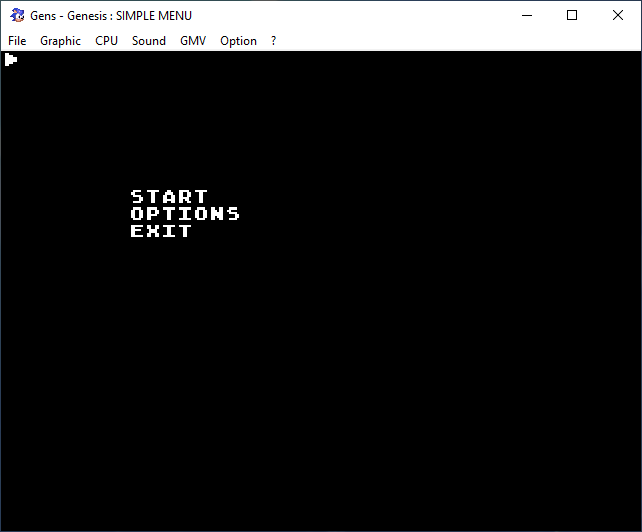
Now we’ll create an array of options that will make up our menu. We’ll go with 3 options total, but of course you can make your menu as small or large as you want. We also initialize it immediately.
#define NUM_OPTIONS 3
Option options[NUM_OPTIONS] = {
    {8, 8, "START"},
    {8, 9, "OPTIONS"},
    {8, 10, "EXIT"},
};
Note that the coordinates are given in tiles, not pixels!
Finally we’ll need two variables. The first will store the index of the current option we’re highlighting, while the second will be our cursor sprite.
u8 currentIndex = 0;
Sprite *cursor;
Okay, time to start the implementation! Let’s start by drawing the options on screen. Jump into main() and add the following lines:
//Draw options
u16 i = 0;
for(i; i < NUM_OPTIONS; i++){
    Option o = options[i];
    VDP_drawText(o.label,o.x,o.y);
}
Here you can see the advantage of our Option type. Each Option in our array knows where it is supposed to go and what its label is supposed to be, so we can simply iterate through them and draw them where they belong. If we want to change anything we won’t have to touch the loop, just the definition of the array above.
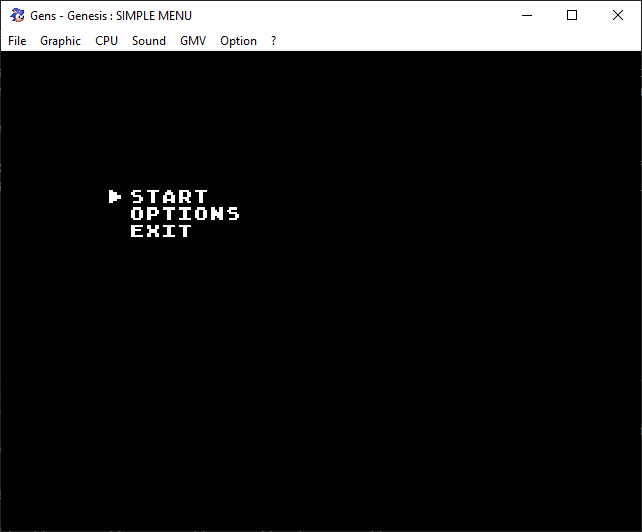
Let’s add our cursor next. Download the cursor sprite below:
Click to download the cursor sprite
Put it in the res folder of your project, create a resources.res file in the same folder and add the following line:
SPRITE gfx_cursor "cursor.bmp" 1 1 NONE 0
Then include the resources in your project by adding the appropriate line at the top of main.c:
#include <resources.h>
Now initialize the sprite engine and add the cursor graphic in main():
SPR_init(0, 0, 0);
cursor = SPR_addSprite(&gfx_cursor, 0, 0, 0);
And finally update the sprite engine every frame by adding a line to your main game loop so it looks like this:
while (1)
{
    SPR_update();
    SYS_doVBlankProcess();
}
Alright, if you compile the game now you should see all the stuff on screen. Now let’s make it work as it’s supposed to!
Making it Work
First we’ll need to create some functions that will do our menu things. Let’s start with a simple one that will position our cursor:
void updateCursorPosition(){
    SPR_setPosition(cursor, options[currentIndex].x*8-12, options[currentIndex].y*8);
}
This function takes the coordinates of the currently selected Option, converts them to pixel coordinates (the options store them as tile coordinates, remember?) then places the cursor sprite slightly left of that. Add a call to this function in main(), before the game loop starts, to position the cursor right when the game begins.
By the way: I highly recommend creating prototypes for all these functions, as you’ll probably run into errors otherwise!
Next up are two functions that will be called when we’re moving the cursor up or down in our menu:
void moveUp(){
    if(currentIndex > 0){
        currentIndex--;
        updateCursorPosition();
    }
}

void moveDown(){
    if(currentIndex < NUM_OPTIONS-1){
        currentIndex++;
        updateCursorPosition();
    }
}
These functions are pretty simple. They check whether we can actually move the cursor up or down, then they change the currentIndex accordingly and update the cursor position on screen. Since our options are stored in an array, the index can’t go lower than 0 and not higher than the index of the last option in the array.
But we can’t actually move anything yet, as we haven’t implemented any controls. So create a simple event handler for joypad input:
void joyEventHandler(u16 joy, u16 changed, u16 state){
    if (changed & state & BUTTON_UP)
    {
        moveUp();
    }
    else if(changed & state & BUTTON_DOWN){
        moveDown();
    }
}
Now hook it up at the beginning of main() with:
JOY_init();
JOY_setEventHandler(&joyEventHandler);
And if you compile and run the game now, you should be able to move the cursor up and down! Now there is only one step left: Actually doing things when an option is selected.
Selecting Options
For that we will need a couple more functions. First we will need a function that is called when we press a button on the controller. This function will check what menu option is currently highlighted and then call the respective function…which we will also have to define.
void select(u16 Option){
    switch (Option)
    {
    case 0:{
        pickStart();
        break;
    }
    case 1:{
        pickOptions();
        break;
    }
    case 2:{
        pickExit();
        break;
    }

    default:
        break;
    }
}
The functions pickStart(), pickOptions() and pickExit() are the functions that will actually do the desired things. For example, this is where you would start the game, switch to the options menu or go back to the title screen. But we’ll keep it simple and just draw a text on screen, telling us what option has been picked. So define the functions like this:
void pickStart(){
    VDP_clearText(8, 12, 20);
    VDP_drawText("Picked Start", 8, 12);
}

void pickOptions(){
    VDP_clearText(8, 12, 20);
    VDP_drawText("Picked Options", 8, 12);
}

void pickExit(){
    VDP_clearText(8, 12, 20);
    VDP_drawText("Picked Exit", 8, 12);
}
And finally, add a new condition to the joypad callback so that we can actually select something by pressing the Start button on our controllers:
if(changed & state & BUTTON_START){
    select(currentIndex);
}
And that’s it! Compile the game and try it out.
Here’s a recap of how this whole thing works. We have an array of options, with each option storing its own position and label. We then draw these options on screen. By pressing up or down on the controller, we decrease or increase an index value that can’t go lower than 0 or above the total number of options. This also updates the cursor position. And once we hit start, we execute whatever function is assigned to that index value.
So actually, we’re never really moving the cursor with the joypad input; we just modify currentIndex. Everything else is updated automatically. This implies that we wouldn’t need to draw our menu at all, but also means that we can draw our menu pretty much any way we want. For example, you can create a diagonal menu with more spacing between the options just by changing the coordinates of the items in the options array:
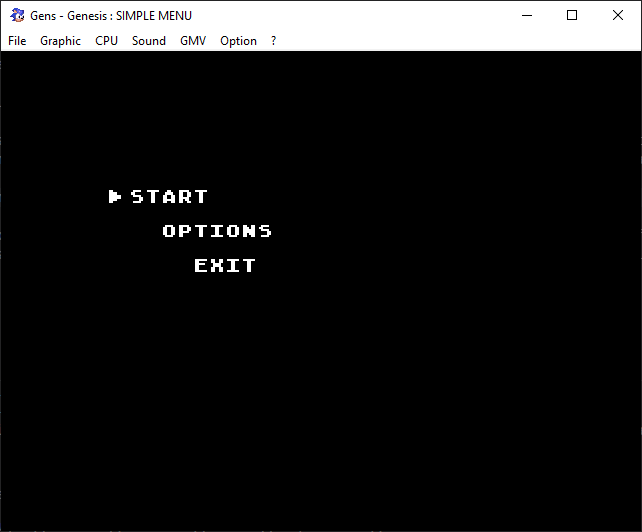
And since internally our menu code doesn’t care what the menu actually looks like, this will just work out of the box!
It’s rather simple once you’ve grasped the basic concept behind it. The important thing to watch out for is that the indexes, option labels and functions are synced up. If you change the order of items in the options array, you’ll also need to modify select() so that the correct function is called.
Thank you for reading and be excellent to each other!
If you've got problems or questions, join the official SGDK Discord! It's full of people a lot smarter and skilled than me. Of course you're also welcome to just hang out and have fun!

Want To Buy Me a Coffee?
Coffee rules, and it keeps me going! I'll take beer too, though.
Check out the rest of this tutorial series!
Comments
By using the Disqus service you confirm that you have read and agreed to the privacy policy.
comments powered by Disqus