Color Swapping
NOTE:
This tutorial is most likely not compatible with versions of SGDK above 1.70.
Unfortunately, I simply do not have the capacity or ability to update them right now. Read more about it here. Sorry.


Having to use palettes is one of those things that seem like a restriction at first, but… well okay, it is a restriction. But palettes can also be a powerful tool if you know how to use them right. One very simple but effective thing you can do is color swapping.
How does it work? The Mega Drive uses a palette of 64 colors that is shared among all visual assets in a game. The images you use for the tiles and sprites don’t actually store their own color data; instead, they just store references to specific colors in that universal palette. Basically, each pixel in an image is assigned a number pointing to a certain color in the palette. The pixel doesn’t know what color it is, only where the color is in the palette. With color swapping, we can swap out the colors in the palette, thereby changing the colors in a sprite without actually having to modify the sprite itself!
Want to give it a try? Let’s whip up a quick sample project to play around in. We’re gonna put our Megarunner dude on screen, then use color swapping to change his outfit. Sound good? Then let’s go!
Setting up
First, grab my project template or use one of your own. Then, download the sprite we’ll be using by clicking here. Thanks once more to Jonathan for making the sprite available in his Game Creator’s Pack! (Don’t right-click and save the image below, you have to download the .zip file in order for this to work!)

Put the sprite image file inside of your project’s resources folder and tell SGDK to import and process it by adding the following line inside your resources.res file:
SPRITE runner "player.bmp" 2 2 NONE 20
That’s the basic setup done, now let’s get coding. We’ll be using the A, B and C buttons to swap between different colors, so we have to set up a controller. First create a joypad callback function:
void myJoyHandler( u16 joy, u16 changed, u16 state)
{
	if (joy == JOY_1)
	{
		if (state & BUTTON_A)
		{

		}
		else if (state & BUTTON_B)
		{

		}
		else if (state & BUTTON_C)
		{

		}
	}
}
Then set it up at the start of the main function with these two lines:
//Input
JOY_init();
JOY_setEventHandler( &myJoyHandler );
And that’s this part over with. Next, let’s put our sprites on screen by adding these lines after the previous ones in main():
/*Grab the palette data from the runner sprite and stick it in PAL1*/
VDP_setPalette(PAL1, runner.palette->data);

/*Start the sprite engine and add the player sprites*/
SPR_init(0,0,0);
for(int i = 0; i < 10; i++){
	SPR_addSprite(&runner,64+(i*16),64,TILE_ATTR(PAL1,0,FALSE,FALSE));
}
SPR_update();
And don’t forget to call SPR_update() inside of your while loop:
while(1)
{
	SPR_update();
	SYS_doVBlankProcess();
}
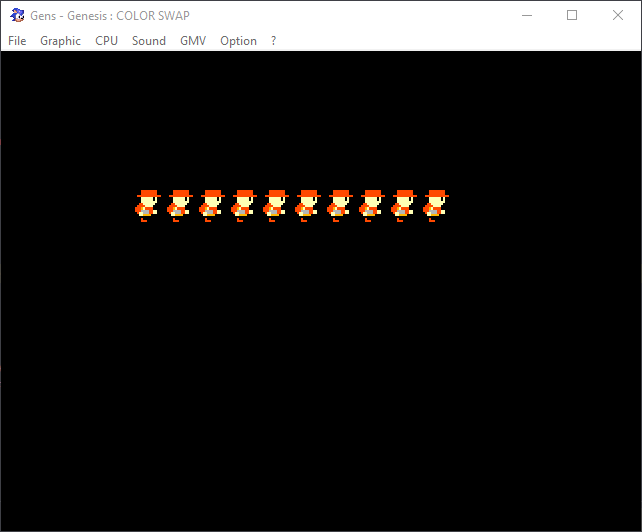
Basic stuff so far. We’re adding 10 instances of our player sprite (just because it looks cool) and as you can see we’re saving the colors of the image inside of PAL1. Here is the palette that the image is using:
We said we were going to change the outfit of our Megarunner dude. As you can see, the orange color that is used for his hat, shirt and pants is at position 3. Remember that, we’ll need it in a second!
Swapping Colors
If you compile the game now you should have ten default-colored runner dudes running in place. Let’s go designer on them and change their style! For that, we first need some variables to store the colors we’ll be using. At the top of main.c define the following:
u16 color_gray = -1;
u16 color_blue = -1;
u16 color_default = -1;
Now let’s put the colors we want in there. After the code that puts our sprites on the screen, add these three lines:
//Set up colors
color_gray = RGB24_TO_VDPCOLOR(0x808080);
color_blue = RGB24_TO_VDPCOLOR(0x0000ff);
color_default = VDP_getPaletteColor(18);
The first two lines are simple: We use the helper function RGB24_TO_VDPCOLOR to convert regular RGB hex values into a format SGDK understands, then save those values in our new variables. The third line is a bit more interesting: As the name implies, we’re not creating a new color but are actually grabbing one from the color palette; the color saved at index 18, to be more precise. This is the default color of our dude’s clothes.
But wait, how do we know to use index 18? Wasn’t that color at position 3? Yup, however: As you may remember, we put the color data of our image into PAL1, and there is actually a PAL0 before it. Each of the four palettes stores 16 colors, so the third color in the second palette (PAL1) is actually at position 16 + 3 = 19! And since the colors are actually stored in an array, we start counting at 0, meaning the final position of our desired color is 16 + 3 - 1 = 18.
But enough theory, let’s get coloring. Define the following function at the top of main.c:
void swapToColor(u16 Col){
	VDP_setPaletteColor(18, Col);
}
As should be obvious, VDP_setPaletteColor is the counterpart to VDP_getPaletteColor. Instead of getting a color from an index, it sets a color at a certain index of the palette; in our case it sets the color at index 18 to whatever we pass into the function.
Now there is only one last thing to do: Actually use this function! Go to the joypad callback we defined, and add three calls so that the function looks like this:
//...
if (state & BUTTON_A)
    {
        swapToColor(color_gray);
    }
    else if (state & BUTTON_B)
    {
        swapToColor(color_blue);
    }
    else if (state & BUTTON_C)
    {
        swapToColor(color_default);
    }
And that’s it! Compile the game and you should now be able to change the outfit of our dudes. Pressing A gives them a suave gray outfit, B a cool blue one and C resets the color to the default orange.
The vest sticks out a bit though…maybe you can add some code to change the color of it so that it matches the rest of the outfit?
By the way, we’ve used color swapping to create a cool flashing effect in the Megapong Bonus Tutorial!
If you've got problems or questions, join the official SGDK Discord! It's full of people a lot smarter and skilled than me. Of course you're also welcome to just hang out and have fun!

Want To Buy Me a Coffee?
Coffee rules, and it keeps me going! I'll take beer too, though.
Check out the rest of this tutorial series!
Comments
By using the Disqus service you confirm that you have read and agreed to the privacy policy.
comments powered by Disqus