Megapong 3 - Importing Resources


Welcome back! Last time we set up our development environment to make things easier for us. This time things will get a bit more exciting, as we’ll import a graphic and use it to draw the background for our game! We have a lot ahead of us, so let’s rock. You can either use the project from part 2 or create a new one. This one will become our game, so remember where you put it…
Compiling Resource Files
Resource files are any type of media file that you’d like to use in your game. Images for sprites and backgrounds, audio files for effects and music… all the good stuff. However, before the Mega Drive can deal with our files, we’ll have to compile them into a format it can understand. Luckily SGDK will once again do all the heavy lifting for us!
First of all we need something to actually compile. Download the archive for this part of the tutorial here. Inside you’ll find an image file called bgtile.png. We’ll need that in a second, so put it somewhere within reach. For reference, this is what it looks like (scaled up 4x so you can see it better:)

Please note that you cannot right-click and save this image, you have to download the .zip file above and use the file within!
Now open up your project folder. Inside you will find a subfolder called res. This is where we’ll put all our resources the project needs. Let’s be a bit more organized though! Open up the res folder and create a new subfolder within it. Name it tiles. Now put bgtile.png inside of it! It always pays to be organized, so it’s a good habit to get into.
Alright, now we have our file inside the project folder. However, we still need to tell SGDK what to actually do with it. So, take another look inside your res folder. We’ll now create a file that basically acts as a list of all our resources. SGDK will use that list to convert and import everything we want to use in our game. It’s basically just a text file with a fancy extension, so create it from within VSCode or simply create a new text file in Windows Explorer. Then name that file resources.res. Make sure it’s directly inside the res folder!
Now open that file up and copy the following line into it:
IMAGE bgtile "tiles/bgtile.png" 0
Now save the file. So…what does this mean? Let’s look at it step by step.
IMAGE: This tells SGDK that we want to create a resource of type IMAGE. There are other types (like SPRITE, BITMAP…) but for our purposes, IMAGE is the best choice.
bgtile: This is the name we will use to refer to our resource inside the code. It doesn’t have to match the file name, but I’d recommend it since things could get confusing otherwise.
tiles/bgtile.png: This is the location of the resource we want to import (relative to the resource folder).
0: This digit tells the resource compiler what compression to use. Since our game will hardly tax the Mega Drive hardware we’ll set it to 0 for now, which means no compression.
Since the tile is our only resource for now, you can save and close resources.res. But before we can import it into our game, we have to do something else.
First, compile your project. During compilation, SGDK’s resource compiler will go through the items listed in resources.res and convert them into Mega Drive-compatible files. These will then be listed in a file called resources.h, which will be generated in the res folder. Make sure that this file exists after you’ve compiled the game!
Once the file has been generated, open your main.c file and add the line #include <resources.h> at the very top, after #include <genesis.h>. This will allow us to use the resources in our program.
If you receive an error message and/or a resources.h file isn’t generated, double-check if everything inside resources.res is typed correctly and that the path to the bgtile file is correct.
Putting The Tile On Screen
Now that we have our tile image in the proper format, we’ll put it on screen. There are two steps in order to achieve this: First we’ll load the tile, then we display it. Which is kind of obvious, I guess. Let’s just do it first, then I’ll explain some of the theory behind it.
Put the following line of code at the beginning of your main function in main.c:
VDP_loadTileSet(bgtile.tileset,1,DMA);
The function VDP_loadTileSet does what it says: It loads a tileset. Remember that we imported our file as an IMAGE? A resource of type IMAGE contains three properties: tileset,palette and map. Since we need a tileset, that’s the property we’re referencing. The name bgtile is the one we set in resource.res. If you used a different one, you’ll have to use it here as well! Ignore the 1 and DMA for now.
Okay, with the tile loaded, let’s throw it on the screen. This line of code makes that happen, so put it after the previous one:
VDP_setTileMapXY(BG_B,1,2,2);
Now compile your game and if everything went well, you should have a tile on the screen! …even though the color seems off?
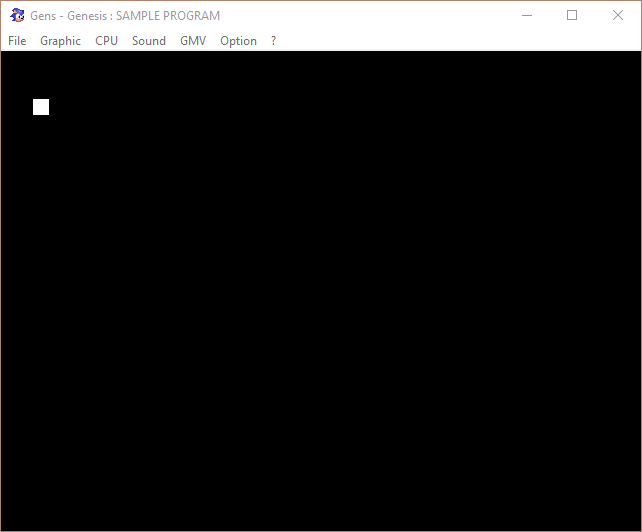
We’ll take care of that soon, but first some explanations!
Theory
Planes
The Mega Drive uses planes to display graphics. When we’re working with tiles, you have two background planes to work with: Plane A and Plane B. In simplified terms you can think of them as layers that determine at what depth your tiles are drawn. For example, Plane A is drawn above Plane B, so you would use that one for foreground tiles, like the ground your character walks on, for example. Plane B is drawn behind Plane A, so that’s where you’d draw a sky or something along those lines. (The priority system deciding the draw order is actually a bit more complicated than that and can easily be overridden, but for this tutorial you can stick to the layer analogy.) Whenever you place a tile on the screen you have to tell SGDK what background plane to draw it on. To refer to the two background planes you use the defines BG_A and BG_B (before version 1.50 of SGDK, these were called PLAN_A and PLAN_B respectively).
Tiles
One MD tile is always 8x8 pixels big. Because this size is fixed, tile coordinates in SGDK are not given in pixels, but tiles. Meaning: If we put a tile at position (1,1) the tile will be placed at pixel-position (8,8). If we add a tile at (2,1), this new tile we appear right next to the first one, at pixel-position (16,8). It’s very simple and useful, but it’s important to keep it in mind, as other things within SGDK actually use pixels as a measure.
VRAM
Finally, let’s quickly talk about VRAM. This is where the Mega Drive stores all the graphics needed for the game. For now you can basically imagine it as a stack of tiles. Whenever you load tiles using VDP_loadTileSet, SGDK puts those tiles onto the VRAM stack. In order to access the tile we want, we have to remember where it was put in the stack. This is done using a simple integer: The first tile to be loaded is tile 1, the second tile is 2 and so on.
With all this theory, let’s see if you can figure out how we just got our tile on the screen! Here is the signature of VDP_setTileMapXY. Take a look at the parameters and try to figure out what we did:
void VDP_setTileMapXY(VDPPlan plan, u16 tile, u16 x, u16 y);
When you know the theory behind it it’s quite simple, but here’s a step-by-step explanation for reference!
VDPPlan: This is the background plane we want to draw our tile on. We picked BG_B.
tile: This tells the function what tile to use, or in other words: This tells the function where in VRAM our desired tile is located. Since we’ve only loaded one tile, it’s at position 1.
x: This is the x-coordinate (in tiles!) where we want to put our tile. We chose 2, which would be 16 in pixels.
y: This is the 25th letter of the alphabet, and also the y-coordinate of where we want to put our tile.
Phew! That was a lot to take in, but we got to put a tile on the screen so it was worth it. One final note though: Remember the 1 I told you to ignore in VDP_loadTileSet(bgtile.tileset,1,DMA);? Well, this 1 actually told SGDK where to put the tile in VRAM. We could have loaded it onto position 2 or 9 or whatever, but then we’d also need to change the tile parameter in VDP_setTileMapXY. Also, we’d have created a gap in the VRAM which you usually don’t want, as it’s confusing. It’s usually best to pile on the tiles one after the other.
As for the DMA, we’ll take a look at that in another tutorial.
And that finally wraps it up for this part! We’re slowly getting somewhere. In the next installment we’ll play around with tiles some more and will also fix the color. Thanks for reading and until next time!
If you've got problems or questions, join the official SGDK Discord! It's full of people a lot smarter and skilled than me. Of course you're also welcome to just hang out and have fun!

Want To Buy Me a Coffee?
Coffee rules, and it keeps me going! I'll take beer too, though.
Check out the rest of this tutorial series!
Comments
By using the Disqus service you confirm that you have read and agreed to the privacy policy.
comments powered by Disqus