Megapong 5 - Sprites


Now that we have a background, it’s time to get things moving! Sprites are different from tiles, so we have a few new things to learn. Let’s get into it and make a bouncing ball!
Importing Sprites
First of all we’ll need a sprite for our ball. You can download it here. Here’s what it looks like (scaled up 4x so you can see it better):

Note that you have to download the file from the link above, right-clicking and saving the above image will not work!
Open the res folder of your project, then create a folder called sprites within it. Put the ball sprite in that new folder. Then open resources.res and add the following line below bgtile:
IMAGE   bgtile    "tiles/bgtile.png"  0
SPRITE  imgball    "sprites/ball.png"  1   1   NONE
This will compile our image as a SPRITE resource. Let’s break it down:
SPRITE: This tells SGDK that we want to create a resource of type SPRITE.
imgball: This is the name we will use to refer to our resource inside the code. It doesn’t have to match the file name, but I’d recommend it since things could get confusing otherwise.
sprites/ball.png: This is the resource we want to import.
1: This is the width of the sprite in tiles. The sprite is 8 pixels wide, which equals one tile.
1: This is the height of the sprite in tiles. The sprite is 8 pixels high, which equals one tile.
NONE: This tells the resource compiler what compression to use. As with the tile, we won’t be using any in this project.
So far so good. If we compile the game now, the ball image should be processed as a SPRITE file. Go ahead, open up resources.h in the res folder and take a peek. Our imgball definition should be in there! Now we just need to get the ball into our game.
Adding The Sprite
First of all we’ll create a variable in which to store our ball sprite, so we’ll have access to it from throughout the game. At the very top of main.c, below the includes, add the line:
Sprite* ball;
This will point to our ball sprite once it’s loaded. But before we load it, we have to lay the groundwork. SGDK uses a sprite engine to handle sprites, and we have to start it first. In the main function, add this line after the code that loads our tiles:
SPR_init();
This will initialize the sprite engine, allowing SGDK to handle and draw sprites. If we want to have sprites in the game (which should be the case for pretty much every game), we need to initialize the sprite engine first!
With the sprite engine fired up, we can now add the sprite to our game. Add this line after the previous one:
ball = SPR_addSprite(&imgball,100,100,TILE_ATTR(PAL1,0, FALSE, FALSE));
This is a bit of a mouthful, so let’s break it down. The signature of the function is
Sprite* SPR_addSprite(const SpriteDefinition * spriteDef, s16 x, s16 y, u16 attribute)
spriteDef: The address in memory of our compiled sprite resource. This is the name we gave our asset in the resource file. Don’t forget the & operator!
x: The x-coordinate (in pixels!) of our sprite
y: The y-coordinate (in pixels!) of our sprite
attribute: These are the same as the attributes for tiles. Counterintuitively, we even use TILE_ATTR to set these. Remember: If we don’t set the palette here, the sprite won’t look right! Also note we are not using TILE_ATTR_FULL here, because we don’t need to set the VRAM position of the sprite.
Note: We’re using the same palette as the background tile we’re using, but as you might have noticed, the ball is actually of a color not used in the tile. I’ve already added the additional colors we need to the tile image, so that’s why this works. Otherwise the sprite in the game wouldn’t look like the .png file.
And another note: As you can see, the coordinates for sprites are given in pixels, not tiles. Keep that in mind, because it’s easy to get mixed up!
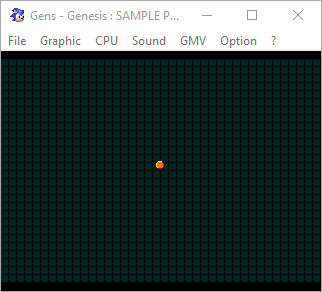
Okay, now our ball is in the game! …or is it? If you compile and run the game now, you won’t see it. This is because we forgot an important step. Remember that sprite engine SGDK uses? We have to tell it to update, which is the step that actually displays the sprites at their current positions. Put this in the while(1) loop, right before the call to SYS_doVBlankProcess();:
SPR_update();
Now compile the game again…and hooray, we have a ball! It’s not doing anything though. A ball isn’t really a ball unless it does ball things, so let’s give it a kick…using code!
Moving The Ball
We will create a function called moveBall() that will move the ball every frame. Define this function before the main function (but after defining Sprite* ball):
void moveBall(){
    //Ball movement goes here
}
We’ll also need some variables to store the position and velocity for the ball. At the top of main.c, below our ball sprite definition, add:
int ball_pos_x = 100;
int ball_pos_y = 100;
int ball_vel_x = 1;
int ball_vel_y = 1;
int ball_width = 8;
int ball_height = 8;
These variables will store the position of our ball, its velocity and its size. We’ll need all of this stuff in a second.
Now in moveBall() we can apply the ball’s velocity to its current position, which will move it. Well it won’t actually move it, because ball_pos_x and ball_pos_y are just some variables we created. In order to actually move the ball sprite, we have to tell the sprite engine to put the ball at this new position. This is what all that looks like:
ball_pos_x += ball_vel_x;
ball_pos_y += ball_vel_y;

SPR_setPosition(ball,ball_pos_x,ball_pos_y);
SPR_setPosition is simple: it takes a sprite, as well as the desired x- and y-coordinates. It will then draw the sprite at these coordinates, which in our case will move our ball around the game field.
Now we just need to call our moveBall() function. In the while(1) loop, before SPR_update();, add:
moveBall();
Compile the game and you should see the ball moving!…off screen. We should probably fix that.
Making The Ball Bounce
To keep the ball within the bounds of the screen, we first need to know the bounds. At the top of the file, add these constants:
/*The edges of the play field*/
const int LEFT_EDGE = 0;
const int RIGHT_EDGE = 320;
const int TOP_EDGE = 0;
const int BOTTOM_EDGE = 224;
These constants define the edges of the playfield we want to use (in our case the full screen). It’s a good idea to store these in variables (or constants, I guess) instead of hardcoding them, because this way we’ll be able to change the size later if we want to.
Go back to moveBall(). Now that we have some bounds, we can check the ball’s position against them. Put this before the positioning code, at the beginning of moveBall():
if(ball_pos_x < LEFT_EDGE){
    ball_pos_x = LEFT_EDGE;
    ball_vel_x = -ball_vel_x;
} else if(ball_pos_x + ball_width > RIGHT_EDGE){
    ball_pos_x = RIGHT_EDGE - ball_width;
    ball_vel_x = -ball_vel_x;
}
In simple terms: If the horizontal ball position is farther left than the left bound, put the ball back at the left boundary. Then invert its horizontal velocity to make it move in the other direction. If the ball is further right than the right bound, do the same thing just on the other side. This makes our ball bounce off the left and right edges of the screen.
Now go ahead and try to write the equivalent code for the vertical axis. If the ball is higher than the top border of the screen, it should bounce back down. If it’s lower than the bottom edge, it should bounce back up.
Here’s the solution:
if(ball_pos_y < TOP_EDGE){
	ball_pos_y = TOP_EDGE;
	ball_vel_y = -ball_vel_y;
} else if(ball_pos_y + ball_height > BOTTOM_EDGE){
	ball_pos_y = BOTTOM_EDGE - ball_height;
	ball_vel_y = -ball_vel_y;
}
Put this after the horizontal check. For reference, this is what the pretty huge function moveBall() should look like right now:
void moveBall(){

	//Check horizontal bounds
	if(ball_pos_x < LEFT_EDGE){
		ball_pos_x = LEFT_EDGE;
		ball_vel_x = -ball_vel_x;
	} else if(ball_pos_x + ball_width > RIGHT_EDGE){
		ball_pos_x = RIGHT_EDGE - ball_width;
		ball_vel_x = -ball_vel_x;
	}

	//Check vertical bounds
	if(ball_pos_y < TOP_EDGE){
		ball_pos_y = TOP_EDGE;
		ball_vel_y = -ball_vel_y;
	} else if(ball_pos_y + ball_height > BOTTOM_EDGE){
		ball_pos_y = BOTTOM_EDGE - ball_height;
		ball_vel_y = -ball_vel_y;
	}

	//Position the ball
	ball_pos_x += ball_vel_x;
	ball_pos_y += ball_vel_y;

	SPR_setPosition(ball,ball_pos_x,ball_pos_y);
}
Alright, that’s a lot of code. Let’s check it out! Compile the game and you’ll see that you now have a bouncing ball, just bouncing around. It’s hypnotizing, really.
While it’s not quite a game yet, it could work as a screensaver for a DVD player. Be proud!
To turn this into a game we’ll need player input. Next time we will add a paddle that the player can move around.
Thanks for reading and until next time!
If you've got problems or questions, join the official SGDK Discord! It's full of people a lot smarter and skilled than me. Of course you're also welcome to just hang out and have fun!
Learned Something?
Want To Say Thanks?
Feel free to buy me a coffee!
No Money?
Then join my Discord instead! It's a cool place with cool people.
Come hang out!Check out the rest of this tutorial series!
Comments
By using the Disqus service you confirm that you have read and agreed to the privacy policy.
comments powered by Disqus